Achieving a lush, vibrant lawn is a goal shared by many homeowners. Yet, the path to a healthy lawn often begins with mastering DIY lawn seeding techniques. Beyond the aesthetic appeal, a well-seeded lawn enhances property value, provides a safe and inviting outdoor space, and contributes to environmental health.
Whether you’re revitalizing an existing lawn or starting from scratch, understanding the nuances of lawn seeding can make a significant difference in the outcome. This guide explores the essential steps to mastering DIY lawn seeding techniques, empowering you to cultivate a lawn that thrives year-round.
Understanding Your Lawn
Before embarking on the journey of seeding your lawn, it’s essential to familiarize yourself with its unique characteristics. Understanding key factors such as soil quality, grass type, and sunlight exposure lays the groundwork for successful seeding and long-term lawn health.
1. Assess Soil Quality
-
-
- Utilize soil testing kits to analyze pH levels, nutrient content, and texture.
- Identify any deficiencies or imbalances that may affect grass growth.
- Consider conducting a soil compaction test to evaluate the existing soil structure and aeration needs, ensuring the foundation is prepared for growing grass.
-
2. Identify Grass Type
-
-
- Research the predominant grass species in your lawn and their specific requirements.
- Determine whether your grass is cool-season or warm-season, as this affects growth patterns and maintenance needs.
- Take note of any areas where different grass types may be present and adjust your seeding strategy accordingly.
-
3. Evaluate Sunlight and Drainage
-
- Observe sunlight patterns throughout the day to identify areas of full sun, partial shade, and deep shade.
- Consider how water drains after rainfall or irrigation and address any drainage issues that may impact seed germination.
- Plan your seeding strategy based on these observations to ensure optimal growing conditions for your grass.
Understanding your lawn’s characteristics is the first step toward successful seeding. By assessing soil quality, identifying grass types, and evaluating sunlight and drainage, you can tailor your seeding approach to create an environment where grass can thrive.
Preparing for Seeding
Proper preparation of the seeding area is essential to create an optimal environment for seed germination and establishment. From clearing debris to amending the soil, each step plays a crucial role in laying the foundation for a healthy lawn.
1. Clear the Area
-
-
- Remove debris, rocks, and existing vegetation to create a clean, level surface for seeding.
- Use a rake or dethatching tool to loosen compacted soil and remove dead grass and thatch.
- Consider using herbicides to eliminate persistent weeds and prevent competition with newly planted grass seedlings.
-
2. Soil Preparation Techniques
-
-
- Aerate the soil to improve air circulation, water penetration, and nutrient uptake.
- Enhance the existing soil structure and fertility by amending it with topsoil and compost, peat moss, or aged manure, creating a nurturing environment for the grass seeds.
- Conduct a soil test to determine if additional amendments such as lime or sulfur are needed to adjust pH levels.
-
3. Choose the Right Seed Variety
-
- Select grass species and varieties that are well-suited to your climate, soil type, and intended use.
- Consider factors such as drought tolerance, disease resistance, and traffic tolerance when choosing a seed blend.
- Consult with local experts or extension services for recommendations based on your specific lawn conditions.
Proper preparation of the seeding area is essential for successful lawn establishment. By clearing the area, aerating and amending the soil, and selecting the right seed variety, you create an ideal environment for seed germination and healthy grass growth.
Seeding Techniques
With the groundwork laid, it’s time to choose a seeding technique that suits your needs and preferences. Whether you opt for traditional broadcasting or explore the efficiency of DIY hydroseeding, proper technique is key to achieving optimal results.
1. Traditional Broadcasting
-
-
- Spread seed evenly by hand or with a broadcast spreader, ensuring thorough coverage of the seeded area.
- Divide the total seed quantity into two equal portions and broadcast half of the seed in one direction, then broadcast the remaining seed in a perpendicular direction.
- Rake the seeded area lightly to ensure good seed-to-soil contact and water thoroughly to initiate germination.
-
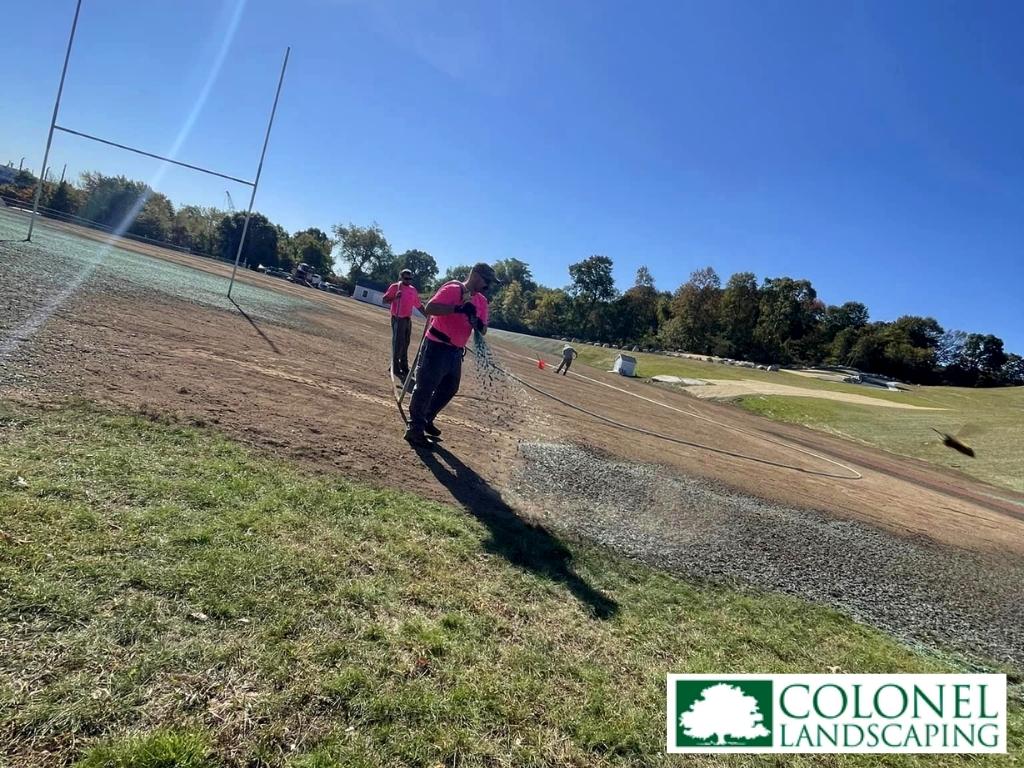
2. DIY Hydroseeding
-
- Create a slurry mixture using a DIY hydroseeding kit by mixing custom grass blend seeds, wood fiber mulch, fertilizer, and water, ensuring an even application over the bare soil.
- Use a hydroseeding machine or garden sprayer to spray the slurry onto the soil surface.
- The mulch layer helps retain moisture and provides a protective barrier for the seeds, promoting faster germination and establishment.
Choosing the right seeding technique is crucial for successful lawn establishment. Whether you opt for traditional broadcasting or DIY hydroseeding, proper technique ensures good seed-to-soil contact and promotes rapid germination and establishment.
Caring for Newly Seeded Lawn
After the seeds have been sown, attentive care is crucial to support their germination and establishment. From watering to fertilization, each step plays a vital role in nurturing your newly seeded lawn to health and vitality.
1. Establish a Watering Schedule
-
-
- Maintain the lawn moist but not waterlogged to support seed germination and early growth, ensuring a lush lawn emergence.
- Water the seeded area lightly multiple times a day to prevent the soil from drying out, especially in hot or windy conditions.
- Gradually reduce the frequency of watering as the grass seedlings mature, transitioning to deeper, less frequent watering sessions.
-
2. Monitor Germination Progress
-
-
- Keep a close eye on the seeded area for signs of germination, such as tiny green shoots emerging from the soil.
- Adjust your watering schedule as needed based on weather conditions, ensuring the soil remains adequately moist to support seedling growth.
-
3. Implement a Fertilization Plan
-
-
- Once the grass seedlings have established roots and begun actively growing, introduce a balanced fertilizer to provide essential nutrients.
- Choose a fertilizer formula specifically formulated for new seedlings, avoiding high-nitrogen products that may promote excessive top growth at the expense of root development.
- Follow application guidelines carefully, applying fertilizer at the recommended rates and avoiding excessive or uneven application.
-
4. Regular Maintenance
-
- Once the grass seedlings have reached mowing height, gradually introduce a regular mowing schedule to encourage dense, vigorous growth.
- Use a sharp mower blade and adhere to the one-third rule, removing no more than one-third of the grass blade height with each mowing session.
- Keep the lawn free of weeds by manually removing any emerging weeds or applying targeted herbicides labeled safe for use on newly seeded lawns.
Caring for a newly seeded lawn requires diligence and attention to detail. By establishing a proper watering schedule, monitoring germination progress, implementing a fertilization plan, and maintaining weed-free conditions, you can nurture your newly seeded lawn to maturity and ensure its long-term health and vitality.
Troubleshooting Common Issues
Despite your best efforts, challenges may arise during the lawn seeding process. From patchy growth to weed invasion, addressing these issues promptly is essential to promoting the health and vigor of your lawn.
1. Patchy Growth
-
-
- Should patchy areas emerge, employing hydraulic mulch seeding over the existing grass can help fill in gaps and promote uniform coverage, contributing to a lush lawn.
- Ensure that the soil surface remains consistently moist to support seed germination in problem areas, and consider covering bare patches with a thin layer of mulch to retain moisture and protect emerging seedlings.
-
2. Weed Invasion
-
-
- Weeds can quickly invade newly seeded lawns, competing with grass seedlings for sunlight, water, and nutrients.
- Address weed issues promptly by manually removing emerging weeds or applying targeted herbicides labeled safe for use on newly seeded lawns.
- Consider implementing cultural practices such as mowing at the appropriate height and maintaining healthy soil to discourage weed growth.
-
3. Pest Infestations
-
- Keep an eye out for signs of pest infestations such as insect damage or disease symptoms in your newly seeded lawn.
- Consult with local experts or extension services to identify the pest species and develop an appropriate management plan tailored to your region and lawn conditions.
- Consider implementing integrated pest management (IPM) strategies, which combine cultural, biological, and chemical control methods to minimize pesticide use and promote environmental sustainability.
Troubleshooting common issues during the lawn seeding process is essential to promoting the health and vigor of your lawn. By addressing patchy growth, weed invasion, and pest infestations promptly and effectively, you can ensure that your newly seeded lawn thrives and flourishes in the long run.
Long-Term Maintenance Tips
Maintaining a healthy lawn is an ongoing process that requires regular attention and care. By implementing long-term maintenance practices and adopting sustainable lawn care techniques, you can ensure that your lawn remains lush and vibrant year after year.
1. Proper Mowing Techniques
-
-
- Mow your lawn at the appropriate height for your grass species, avoiding the temptation to cut it too short, which can stress the grass and promote weed invasion.
- Use a sharp mower blade to ensure clean, even cuts, and adhere to the one-third rule, removing no more than one-third of the grass blade height with each mowing session.
- Consider leaving grass clippings on the lawn to return valuable nutrients to the soil and reduce the need for fertilizer.
-
2. Aeration and Overseeding
-
-
- Regularly perform hydraulic mulch seeding to alleviate soil compaction, enhance air circulation, and promote root growth, ensuring the lush lawn remains healthy.
- Overseed your lawn annually to introduce new grass varieties, fill in thin or bare patches, and maintain a dense, healthy turf.
- Choose grass species and varieties that are well-suited to your climate, soil type, and intended use, and follow recommended seeding rates for optimal results.
-
3. Sustainable Lawn Care Practices
-
- Reduce water usage by watering deeply and infrequently, preferably during the early morning hours to minimize evaporation.
- Incorporate native plants into your landscape to enhance biodiversity and reduce the need for water, fertilizer, and pesticides.
- Minimize chemical inputs by using organic fertilizers, natural weed control methods, and integrated pest management (IPM) strategies to promote environmental stewardship.
Long-term maintenance is essential for preserving the health and beauty of your lawn. By implementing proper mowing techniques, regular aeration and overseeding, and sustainable lawn care practices, you can ensure that your lawn remains lush and vibrant year after year, while minimizing your environmental impact
Takeaway
Mastering DIY lawn seeding techniques, including the efficiency of a DIY hydroseeding kit and hydraulic mulch seeding, yields a beautiful, resilient lawn for years to come, perfect for your next home landscaping project.
By understanding your lawn’s needs, preparing the soil, and employing proper seeding and maintenance practices, you can achieve remarkable results. Remember to stay adaptable, experiment with different approaches, and enjoy the process of nurturing your outdoor haven into a thriving oasis of greenery.
Ready to achieve the lush, vibrant lawn you’ve always dreamed of? Contact us now to schedule a consultation and let our expert team of landscapers help you master DIY lawn seeding techniques. Say goodbye to patchy grass and hello to a beautiful, thriving lawn with Colonel Landscaping by your side.